At 403-PAINTER, we understand that the world of home renovation can be complex, so we’re here to shed light on this unique ceiling texture technique. Whether you’re contemplating a new look for your home or simply curious about knockdown ceilings, we’ve got you covered.
What Are Knockdown Ceilings?
Knockdown ceilings are a type of textured ceiling finish that features a mottled texture, creating a unique and modern look. This effect is achieved by first applying a layer of joint compound (also known as drywall mud) to the ceiling, and then, once it’s partially dried, smoothing it down with a knockdown tool or trowel. This process leaves behind a texture that’s less pronounced than the popcorn or orange peel textures, making it a subtle yet impactful design choice for any room.
Why Choose a Knockdown Ceiling?
Aesthetic Appeal: Knockdown ceilings add a dimensional look to a room, enhancing its overall aesthetic without overwhelming the space. This texture plays well with various lighting conditions, creating interesting shadows and highlights.
Hides Imperfections: One practical advantage of knockdown ceilings is their ability to conceal flaws. If your ceiling has minor blemishes, unevenness, or patches, the texture of a knockdown ceiling can mask these imperfections, giving the ceiling a smooth and refined appearance.
Modernizes Your Space: If you’re looking to update the look of your home without a complete overhaul, adding a knockdown texture to your ceilings can be a simple yet effective way to modernize your living space.
How Is It Done?
Preparation
- Clean Up: Start with a clean slate. Your ceiling should be free of dust, dirt, and any old paint or texture. A simple wipe-down or gentle scraping might be needed. This includes removing any popcorn ceiling texture.
- Check for Damage: Look for any cracks or holes. Fix these before you start with your knockdown texture.
- Prime: If your ceiling has been previously painted or is showing signs of wear, a coat of primer will help the new texture stick better.
Applying Drywall Mud
- Thin Layer: Use a spray gun or a wide spreader to apply a thin, even layer of joint compound across the ceiling. Think of spreading frosting on a cake – smooth and even.
- Consistency Matters: The joint compound shouldn’t be too thick or too runny. Aim for a consistency that’s easy to spread but won’t drip off the ceiling.
Create the Texture
- Wait for It: After applying the compound, wait a bit until it’s almost dry but still slightly tacky. This is usually the perfect time to texture.
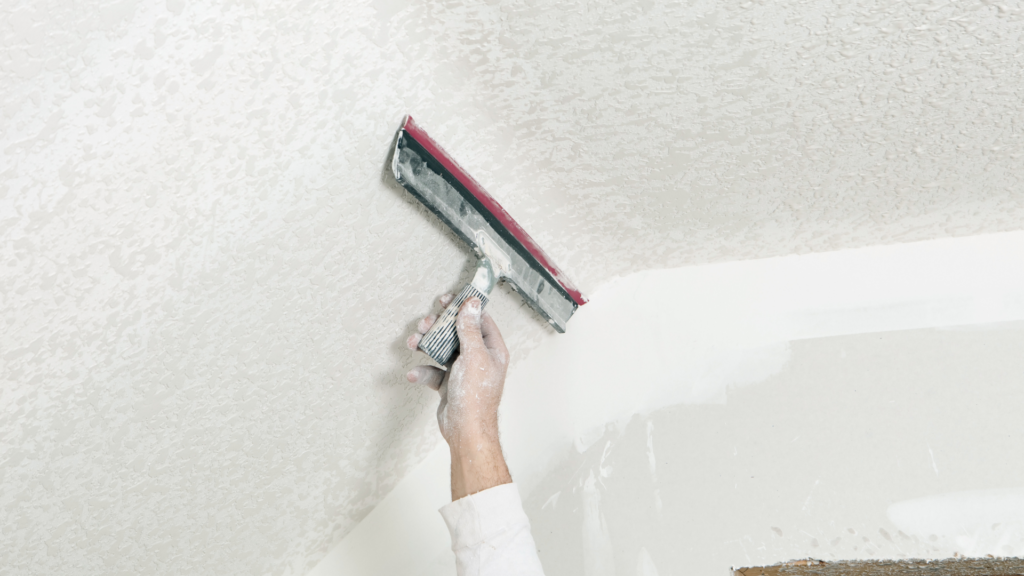
- Knock It Down: Gently drag a knockdown tool or a large trowel across the surface. This flattens the peaks and creates the textured look we’re going for. Do it lightly to avoid scraping off the compound.
Priming and Painting
- Dry: Give the ceiling enough time to dry completely. This can take several hours to a full day, depending on the humidity and temperature in your room.
- Paint: Once dry, paint the ceiling in the color of your choice. A flat or matte finish paint usually looks best on textured ceilings.
Can You DIY a Knockdown Ceiling?
While it’s possible to DIY a knockdown ceiling, it requires patience, the right tools, and a bit of skill to achieve a uniform look. Many homeowners prefer to call in professionals like us at 403-PAINTER to ensure a high-quality finish. Our team has the expertise and equipment to deliver stunning results, making your ceiling renovation project a breeze.
Can I Stay in the Home During the Process?
During the application of a knockdown ceiling, your home will be subject to a certain level of dust and noise, particularly during the initial stages where old textures might be removed and the joint compound is applied.
It’s wise to prepare for this by finding a comfortable spot away from the work area, if possible, to minimize exposure to these disturbances. Moreover, ensuring that the room is well-ventilated is crucial, not only to aid in the drying process but also to mitigate the inhalation of any dust or fumes from the materials used.
It’s also important to note that the specific areas undergoing the knockdown texture application will be off-limits for a period. This temporary inaccessibility requires some planning, especially if the renovation is happening in commonly used rooms of your house.
Regarding the timeline, the entire process from preparation to completion can vary. The preparation stage, which includes cleaning the ceiling, removing any existing textures, and making necessary repairs, can take anywhere from a few hours to a full day, depending on the current state of your ceiling.
The application of the joint compound is a quicker step, though the drying time, which often extends to 24 hours, lengthens this phase. Once the compound reaches the right tackiness, texturing will proceed, a step that, while relatively swift, necessitates a precise timing for optimal results.
Choose Our Experienced Professionals
Ready to transform your home with a stunning knockdown ceiling, say goodbye to outdated popcorn textures, or explore other ceiling texturing options in Calgary? 403-PAINTER is here to bring your vision to life.
Our team of skilled professionals is dedicated to delivering high-quality finishes that elevate the look and feel of your space. Don’t let the details of home improvement slow you down. Call 403-PAINTER today for expert advice, reliable service, and exceptional results tailored to all your ceiling needs.
Frequently Asked Questions
What is a knockdown ceiling texture?
A knockdown ceiling texture is a type of finish that gives your ceiling a mottled, almost stucco-like appearance, but with a softer and more subtle effect. It’s created by applying a joint compound to the ceiling, letting it partially dry, and then gently smoothing it down to create a texture that’s both visually appealing and effective at hiding imperfections.
How long does it take to apply a knockdown texture to a ceiling?
The entire process can vary depending on the size of the area and the specific conditions of your space. Typically, it includes preparation time (a few hours to a day), application of the joint compound (a few hours), drying time (up to 24 hours), texturing, and then painting. On average, you might expect the project to take a couple of days from start to finish.
Can I stay in my home while the work is being done?
Yes, you can stay in your home during the knockdown texture application. However, you should be prepared for some noise and dust, and plan to keep away from the work area. Ensuring proper ventilation and arranging alternative spaces to relax or work in can help minimize any discomfort.
Is it messy to remove popcorn ceilings or apply knockdown textures?
Removing popcorn ceilings and applying knockdown textures can be messy processes due to the dust and debris involved. Professional services like 403-PAINTER take precautions to contain the mess, using drop cloths and plastic sheeting to protect your furniture and floors, and ensuring a thorough cleanup after the project is completed.